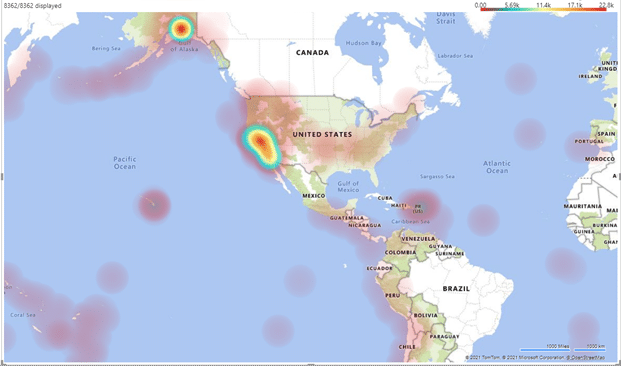
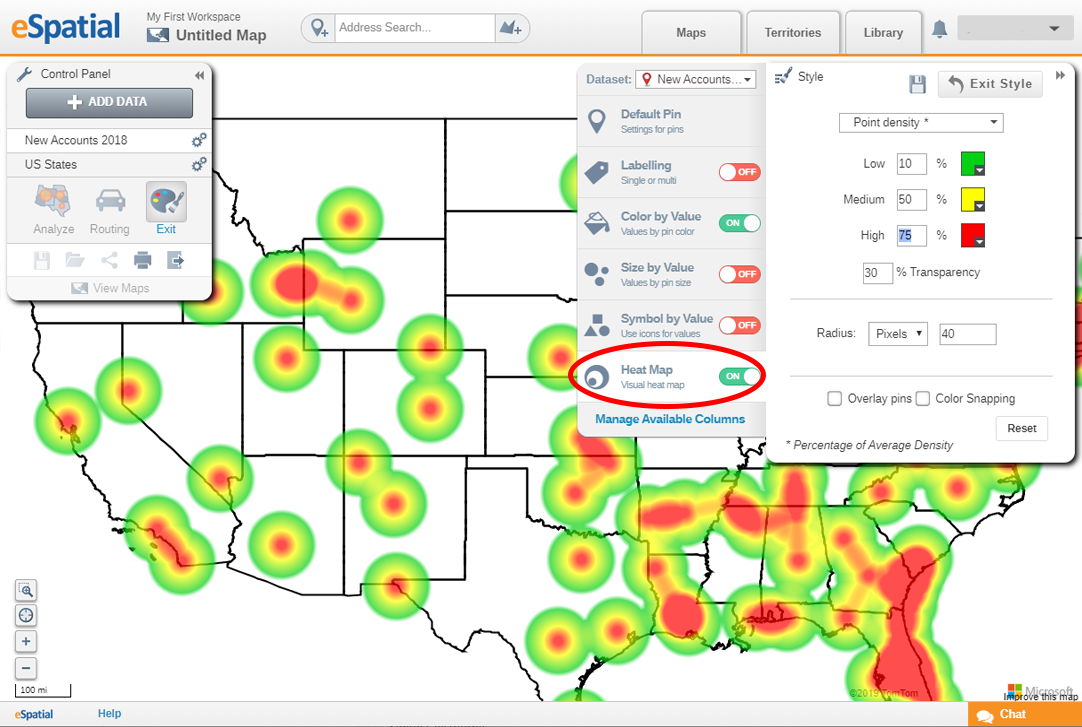
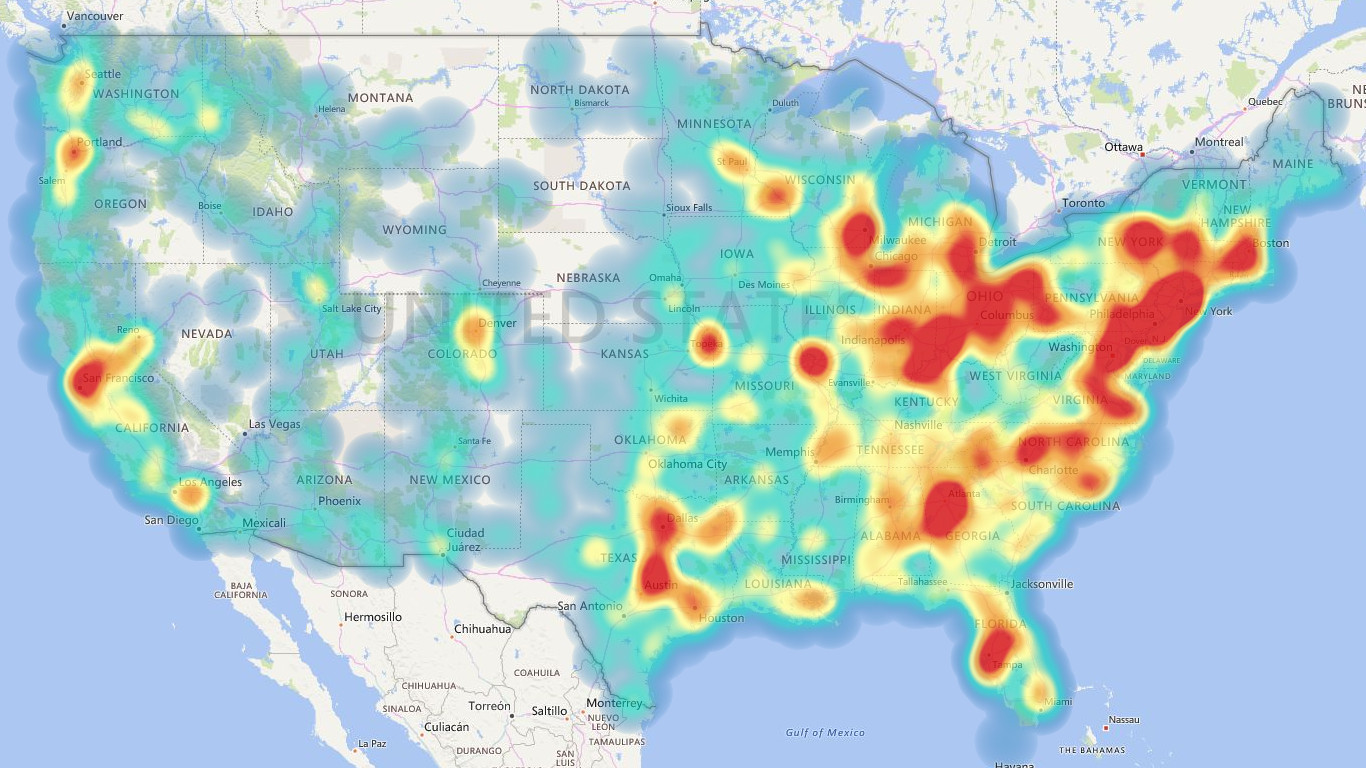
In this module, you will learn how to use the table heatmap power bi custom visual.A heat map helps draw your eye to the most and least popular areas within the.
To create a heat map in power bi, you need to follow the below steps:1.Now, drag and drop the following columns into it:This can be done in a variety of ways, including importing data from excel spreadsheets or connecting directly to data sources such as sql databases or cloud services like google analytics.
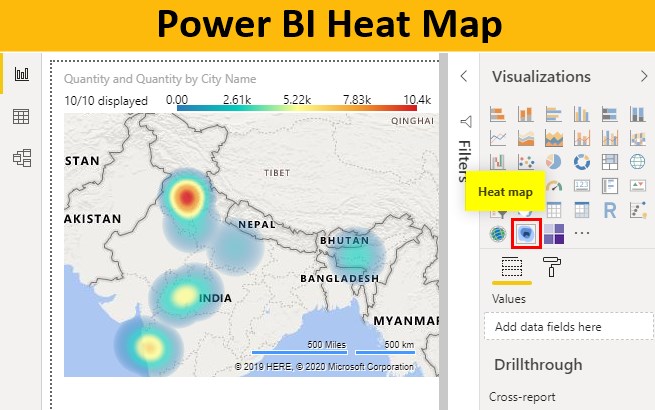
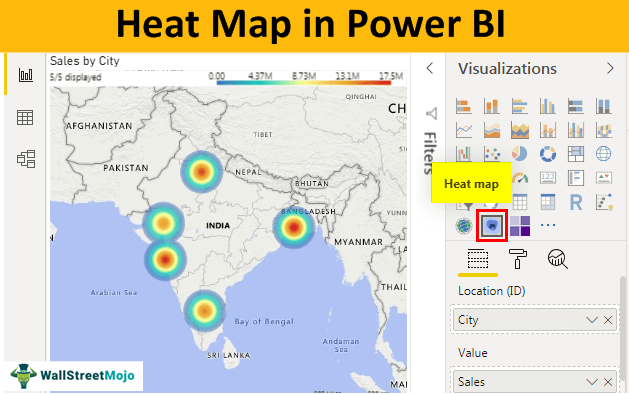
First, select the matrix or table visualization from the visualizations pane.Add a visual map to your report.
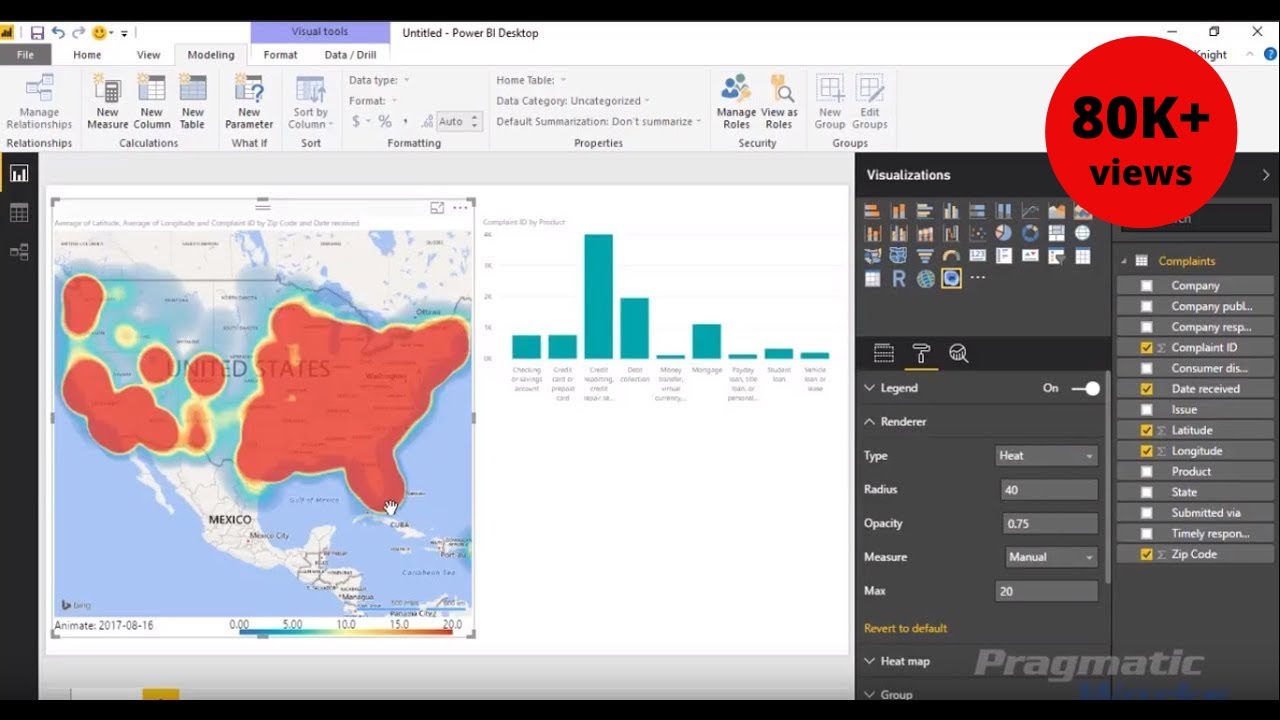
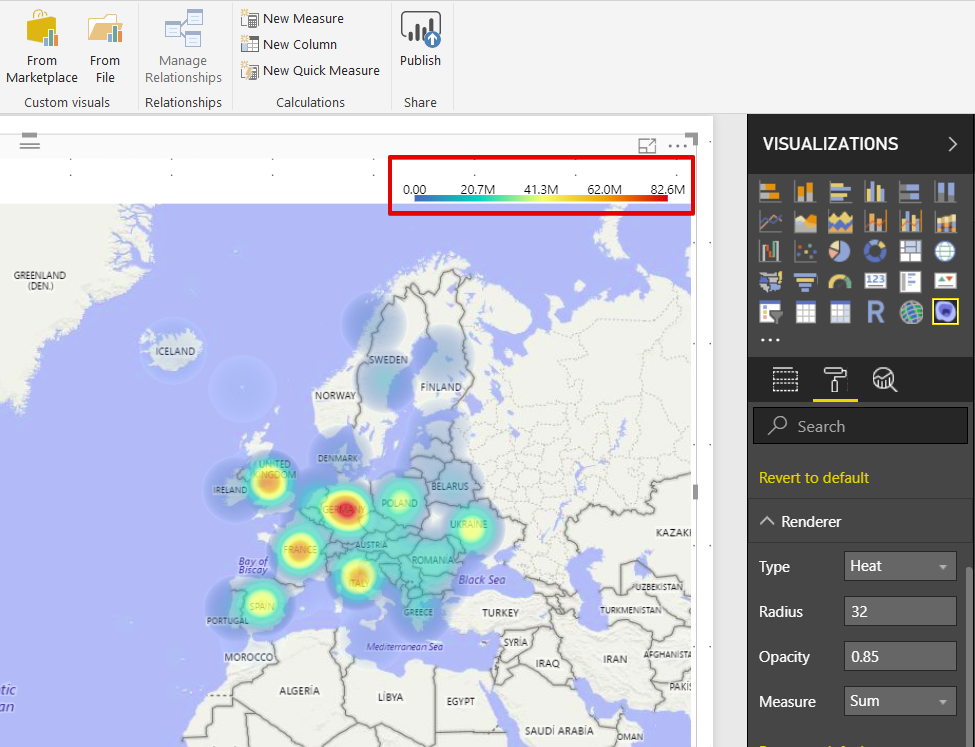
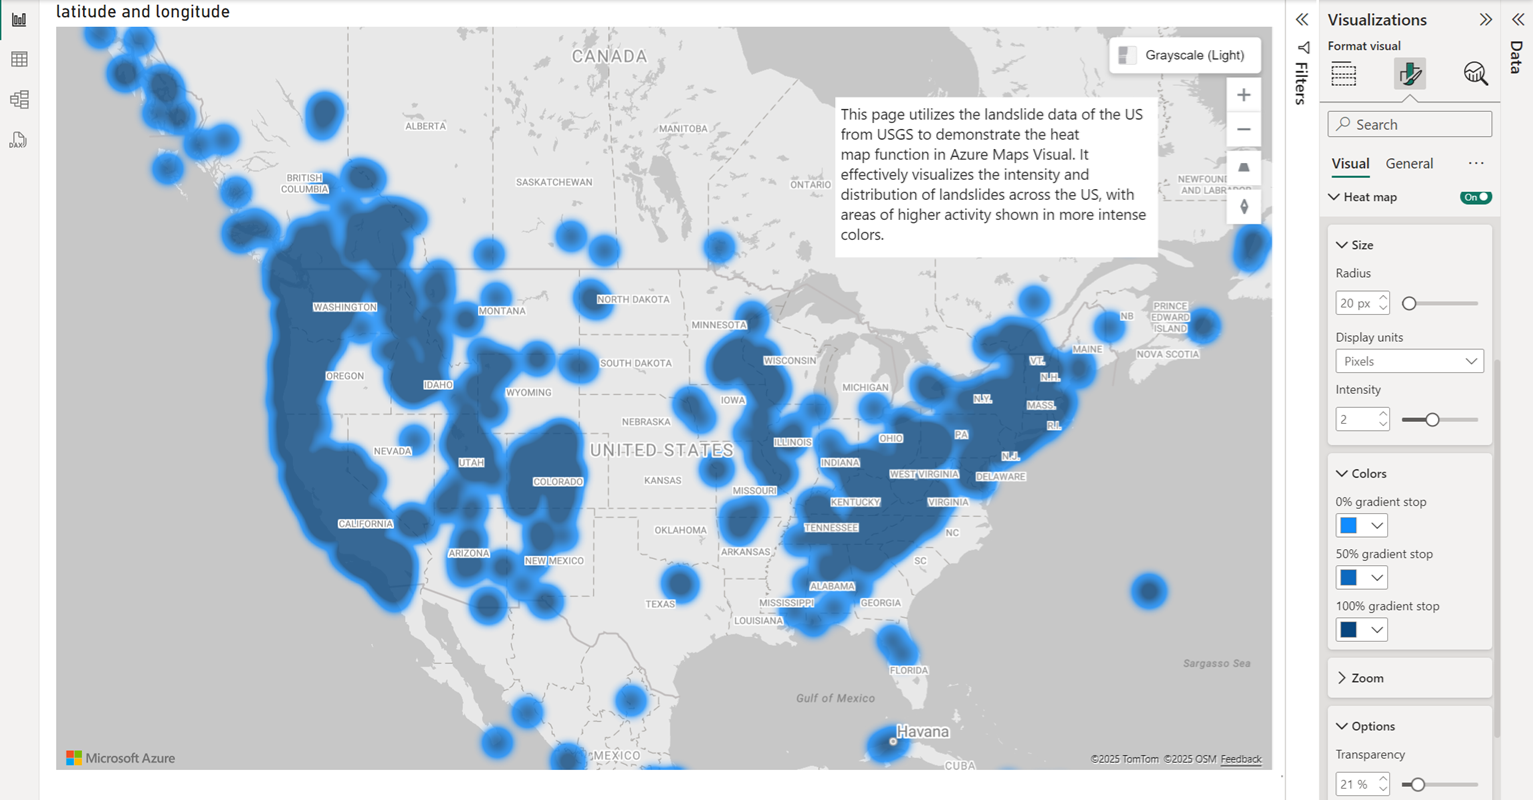
Once your data is loaded, click on report to create a new report canvas where you will build your heatmap.Shows density of data on a map.Does power bi have a heat map?
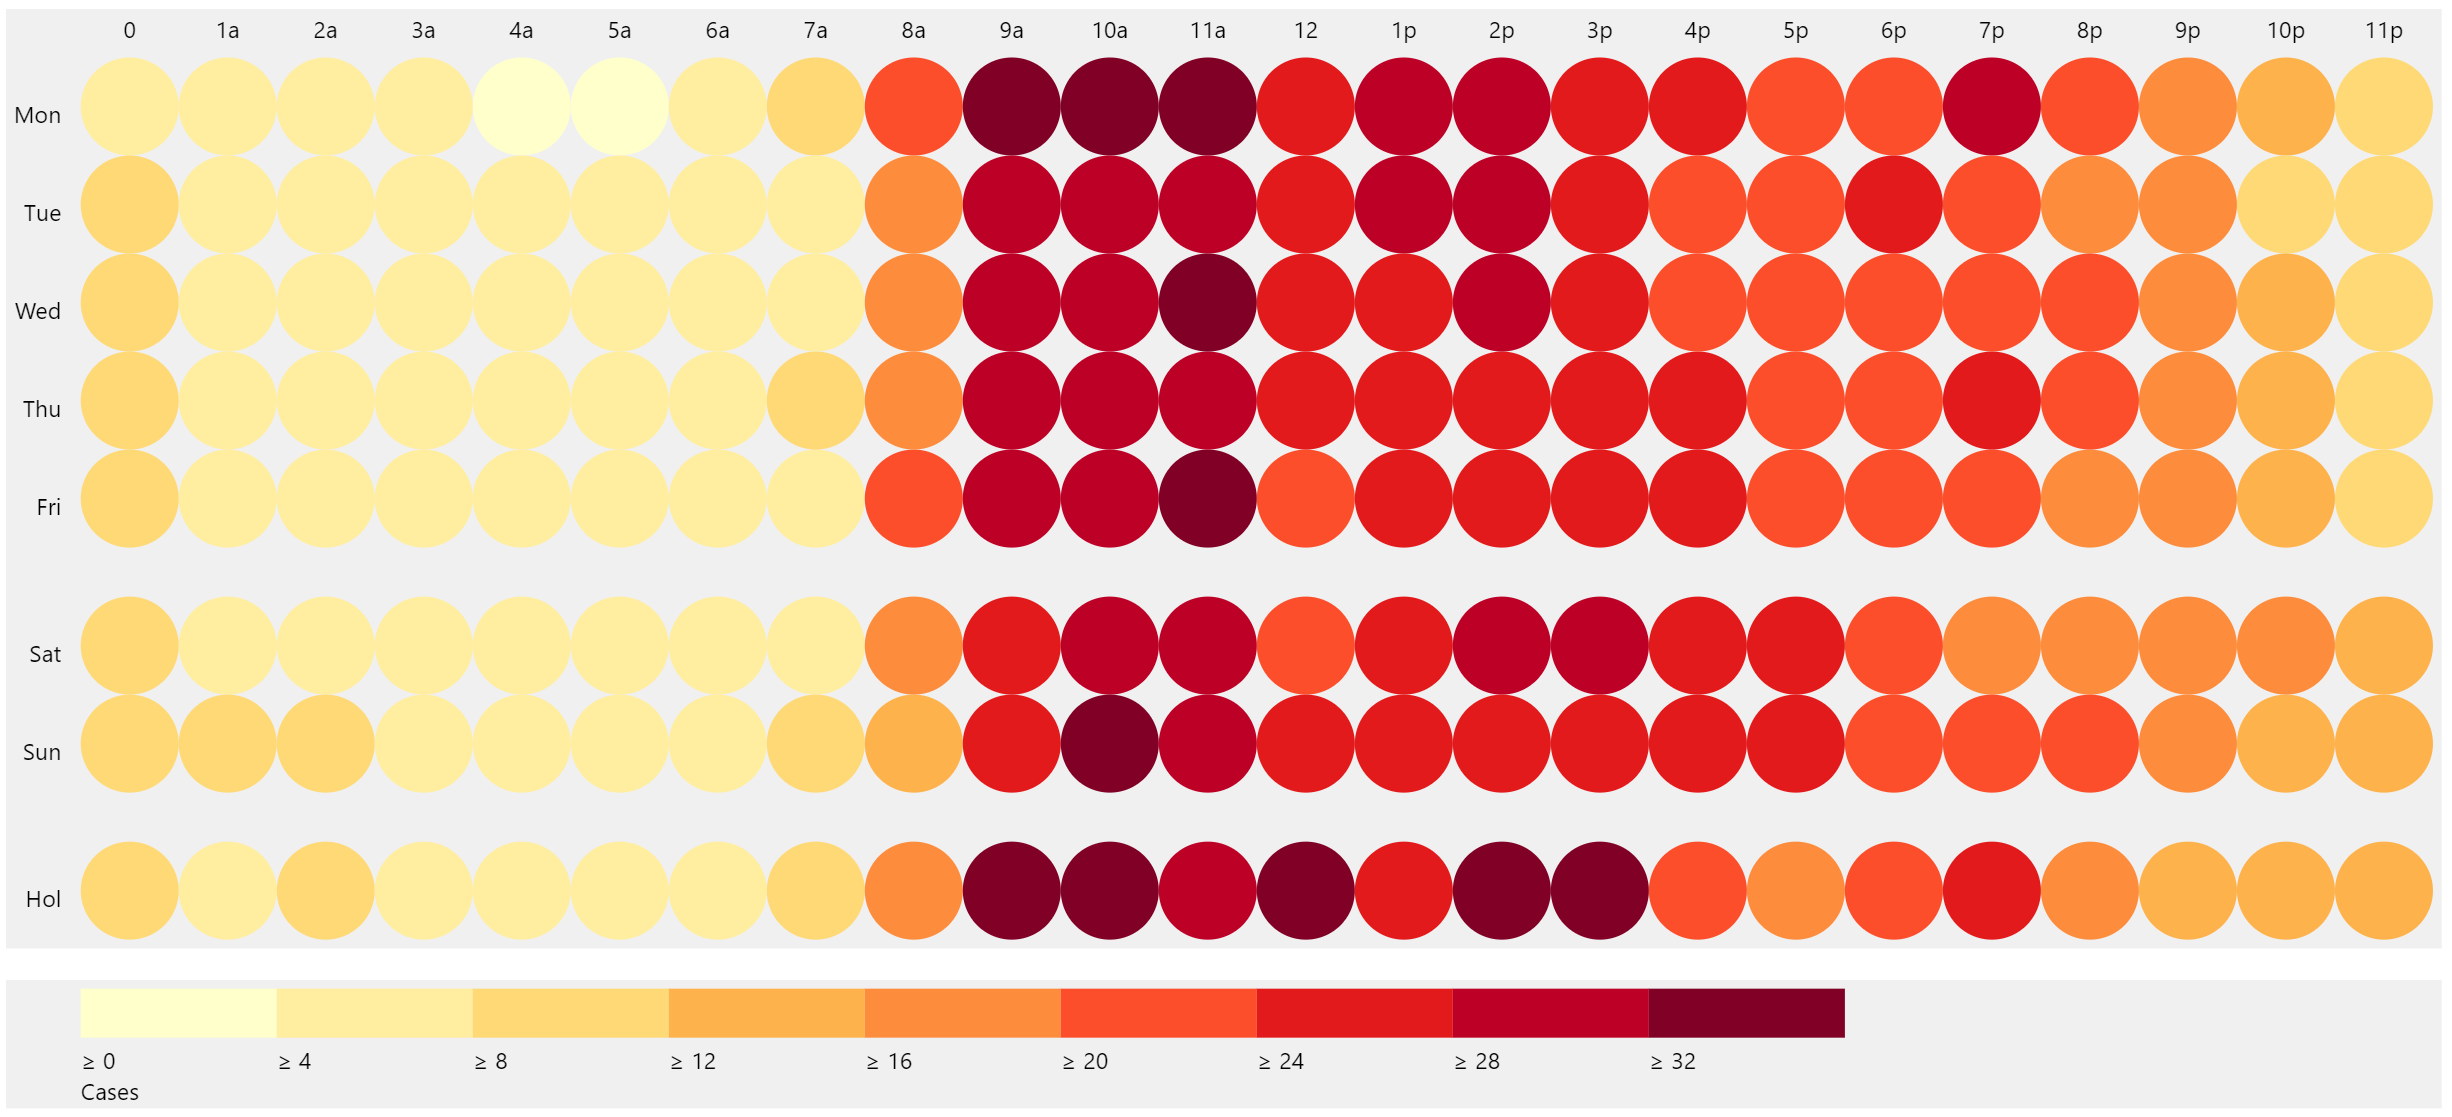
Import the data relevant to your analysis.3.Add the monthnamevariable to the rows section and the dayofweekname to the columns section.
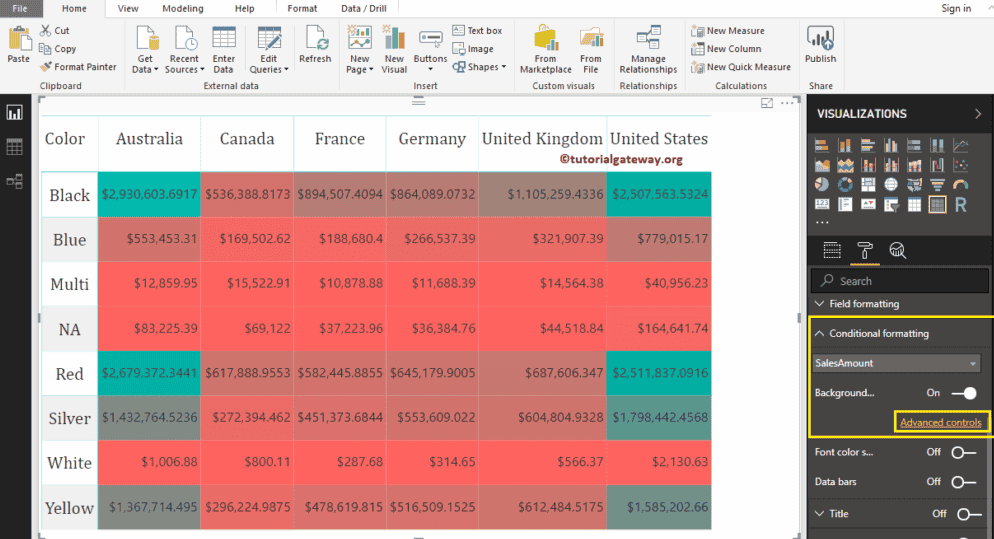
Add the heat map layer.Select the data field that you want to format and choose the formatting rule based on the data values.Next, click the add button on the app page to install the custom power bi heatmap visual.
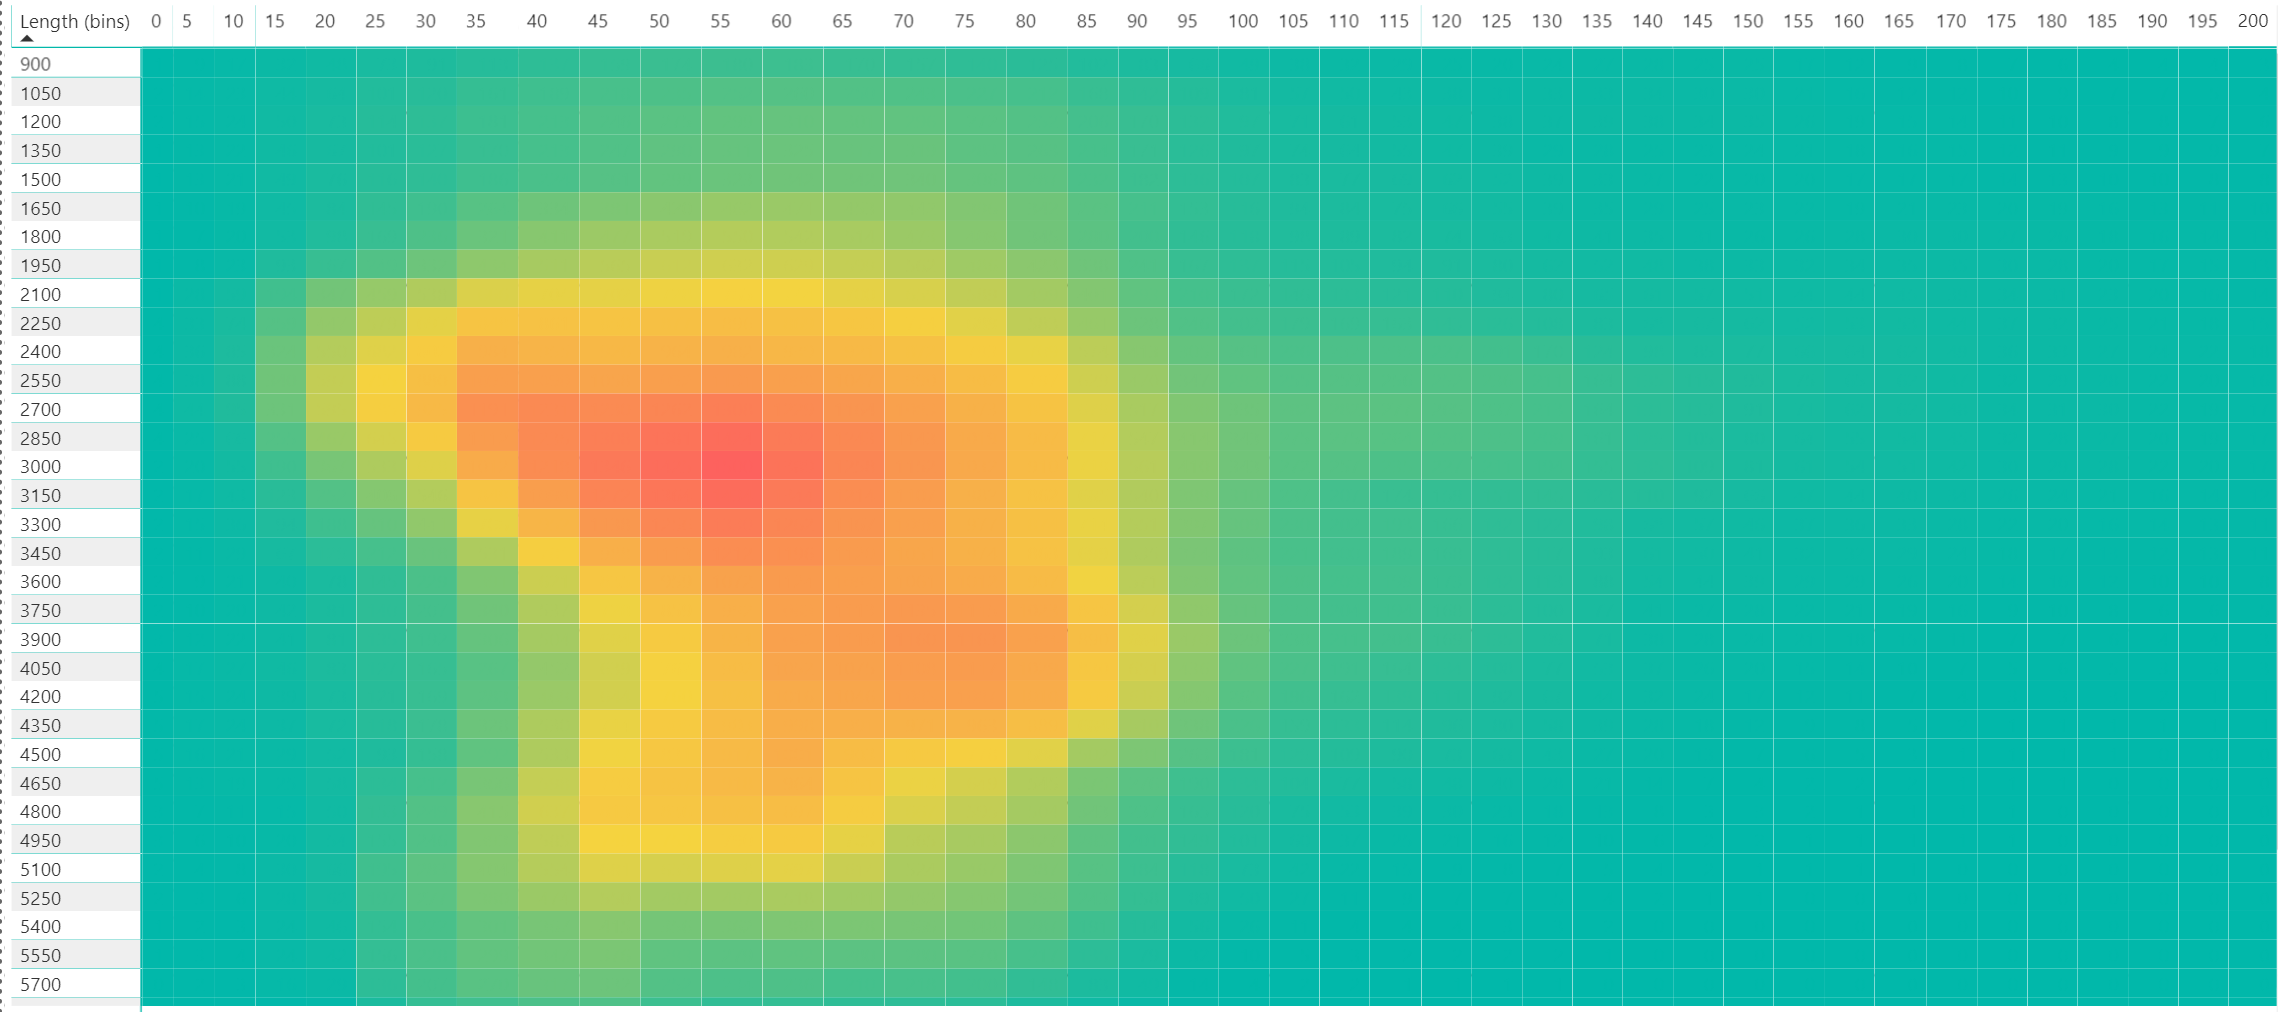
Heatmap is a correlation plot.Now you can adjust all the heat map layer settings to suit your report.
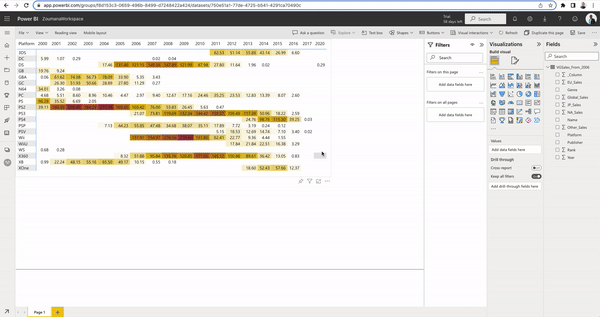
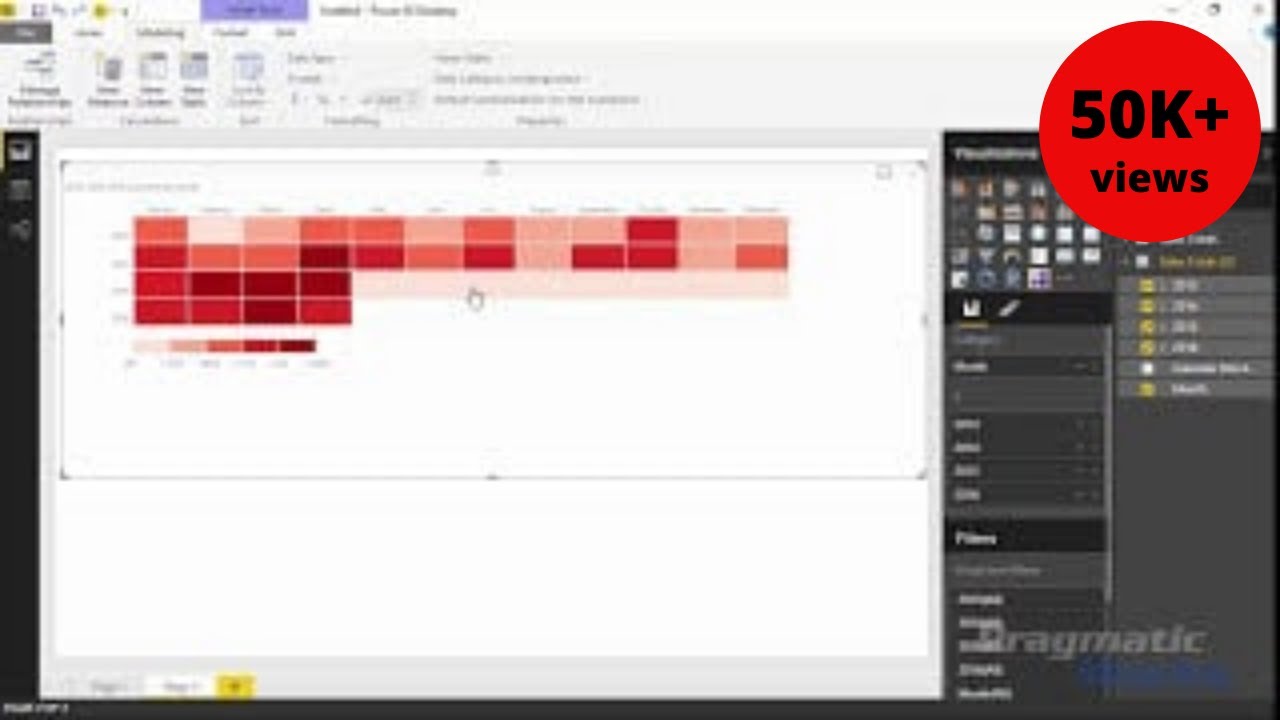
In this quick video we'll learn how to create a heat map in power bi using the default matrix option within the tool.Follow the prompts to import and load your data into power bi.However, instead of seeing traditional values in the table, you actually see colors that represent your values instead.
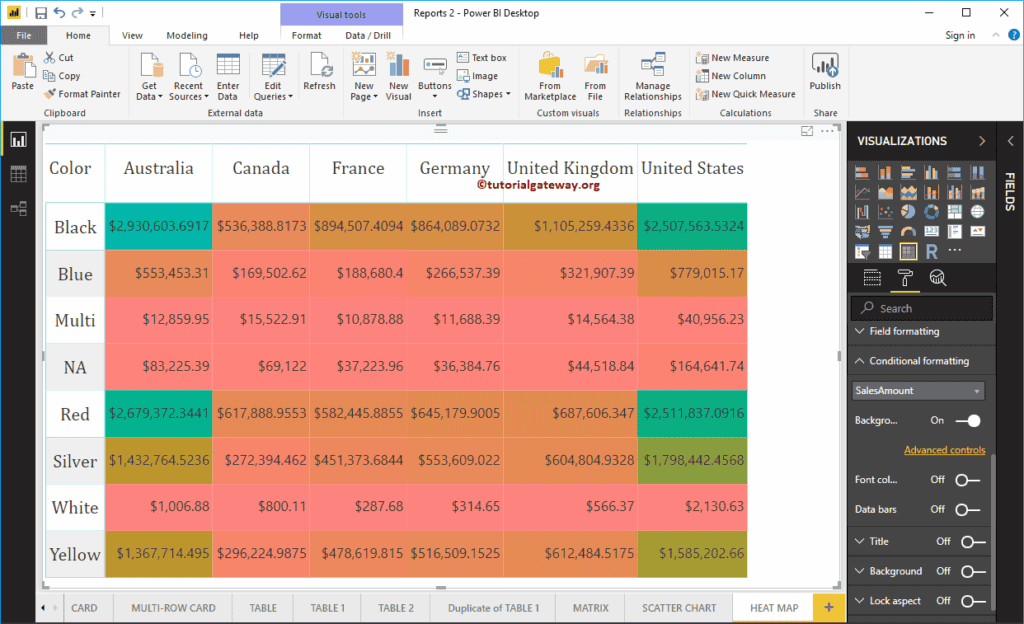
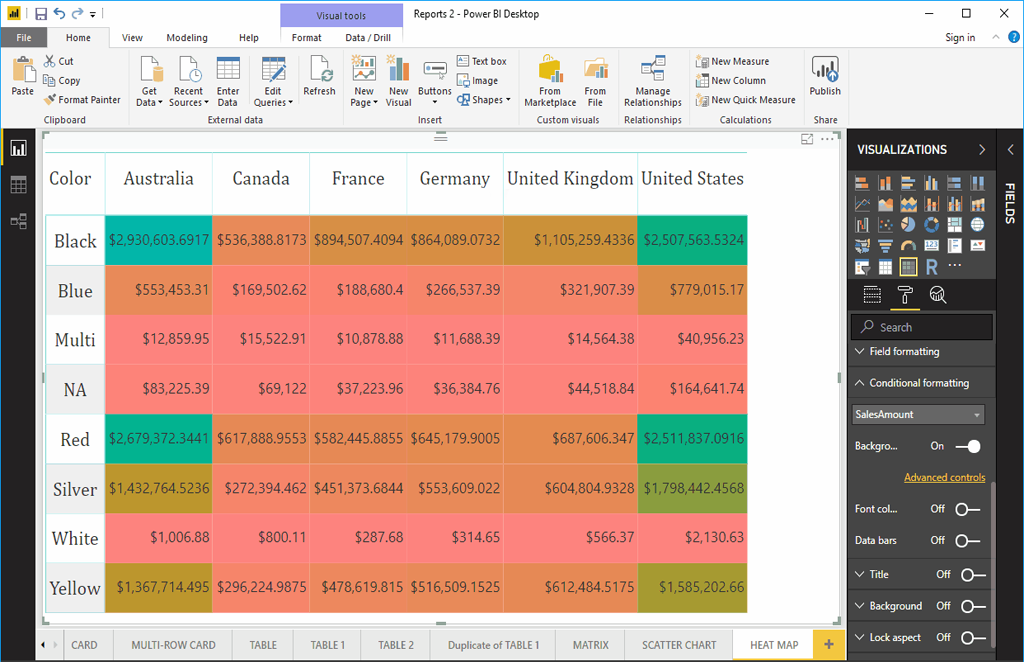
Choose your data and your matrix template.Load your data sets into the power bi desktop interface and select tablevisual from the visualization panel.
Hope you enjoyed the post.
Last update images today Heat Map Using Power Bi
 Fantasy Hockey Best Picks, Analysis From The 2024 NHL Draft
St. Louis City SC has fired coach Bradley Carnell amid a disappointing second season for the MLS team.
The team announced the move on Monday two days after blowing a two-goal lead in a 4-3 loss to Vancouver. St. Louis City (3-7-10) is 12th in the 14-team Western Conference a year after becoming the first expansion team to win a conference regular-season title.
The team lost to Kansas City in the first round of last year's playoffs.
Technical Director John Hackworth will manage the team on an interim basis.
"Given Bradley's many contributions to the club, this was not an easy decision," St. Louis City Sporting Director Lutz Pfannenstiel said in a statement released by the team. "Unfortunately, based on our Year 2 results to date, we believe a coaching change is in the best interest of the club as we regroup and look to improve both our performance and our results."
Carnell was hired as the team's first manager in January 2022 and received a contract extension before this season.
St. Louis City faces San Jose on Wednesday night.